Prezi is an online presentation creator software that enables users to create engaging graphical presentations.
Step 1 - Use your computer to launch your internet browser and go to www.prezi.com. Once there, press the blue "start" button on the top right of the website.
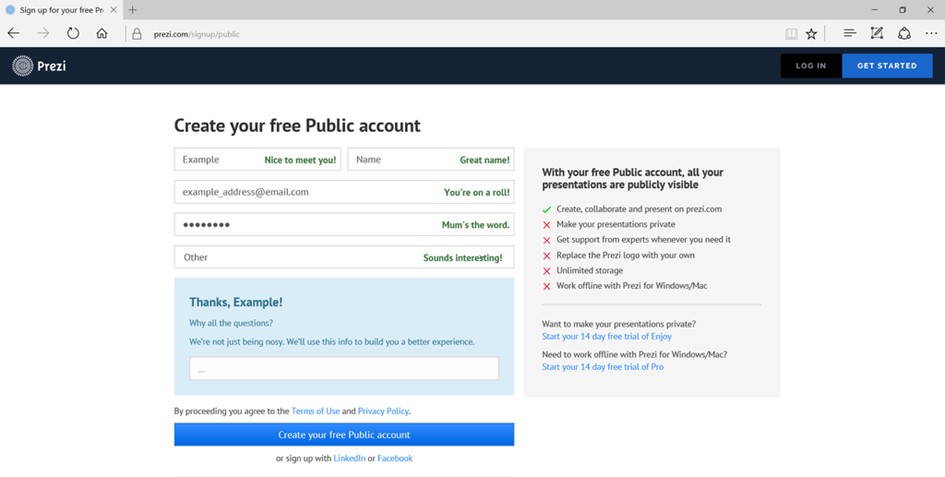
Step 2 - Setting Up an Account : When you click "Get Started", you will be taken to a page listing a number of different pricing options for those willing to pay a monthly fee to get extra features; to create a free account, simply select "Continue for Free" in the right-hand column of your screen. To create a new Prezi account, the website will ask you for: your first name; last name; email address; password; and which of the listed career links best identifies you (if none of the listed links apply to you, simply click on "other"). Once you have entered all your details, simply click on the "Create your free Public account" button at the bottom of the page.
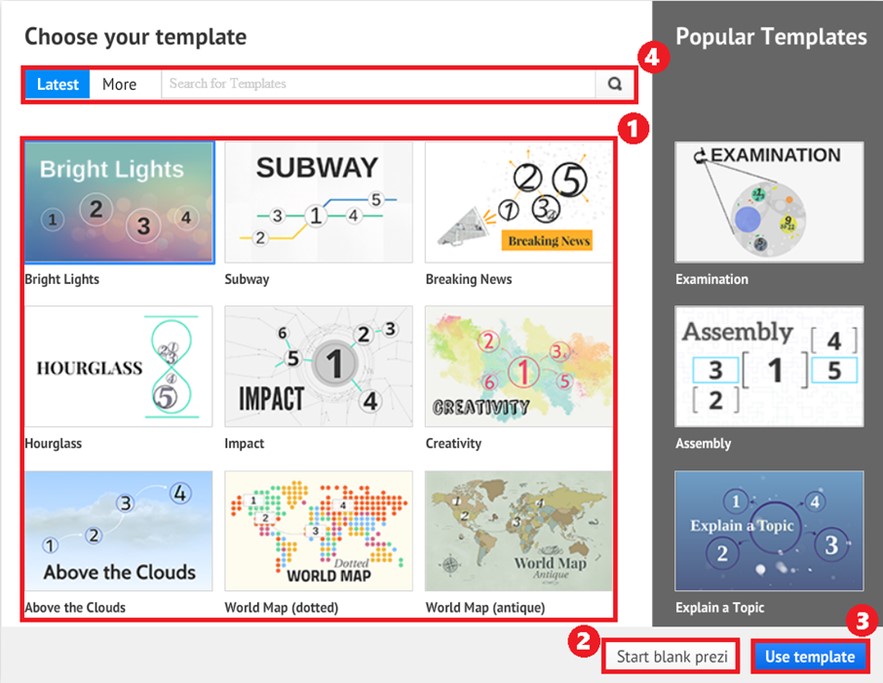
Step 3 - Start a New Prezi: Once in the dashboard, click on the "Create a new Prezi" button to start making your new presentation. This button will take you to a new tab called "Canvas" where you will organise your Prezi. It will prompt you to select a template by clicking on one of the pre-made templates and then clicking on the "Use template" button at the bottom right. If you wish, you can also create an empty Prezi by clicking on the "Start Empty Prezi" button at the bottom of this prompt. For the purposes of this demonstration, select "Start a blank Prezi".
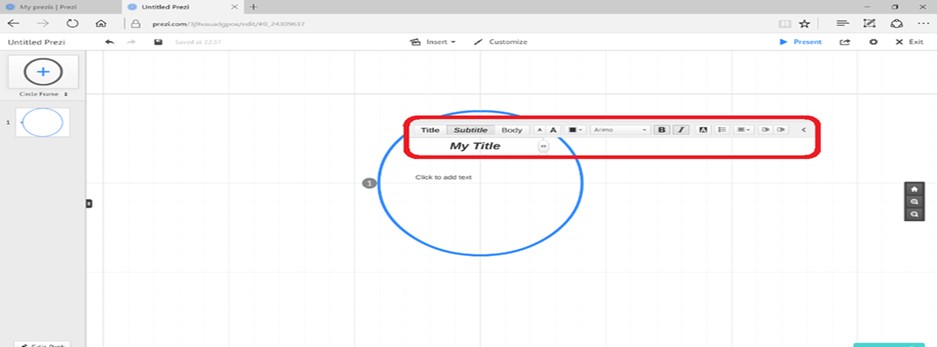
Step 4 - Using the Canvas: You will see a big circle with two labels that say "Click to add text"; this circle is called a frame and is equivalent to "slides" in traditional presentation software such as PowerPoint. To start creating your presentation, click on the area labelled "Click to add text" in bold to give your first frame a title. Once your cursor is in this text area, a small floating toolbar will appear above your cursor, enabling you to adjust the font settings: font; font choice (bold, italic, underline); text colour; spacing; indentation and bulleted list, in case you want to change the formatting of your text.
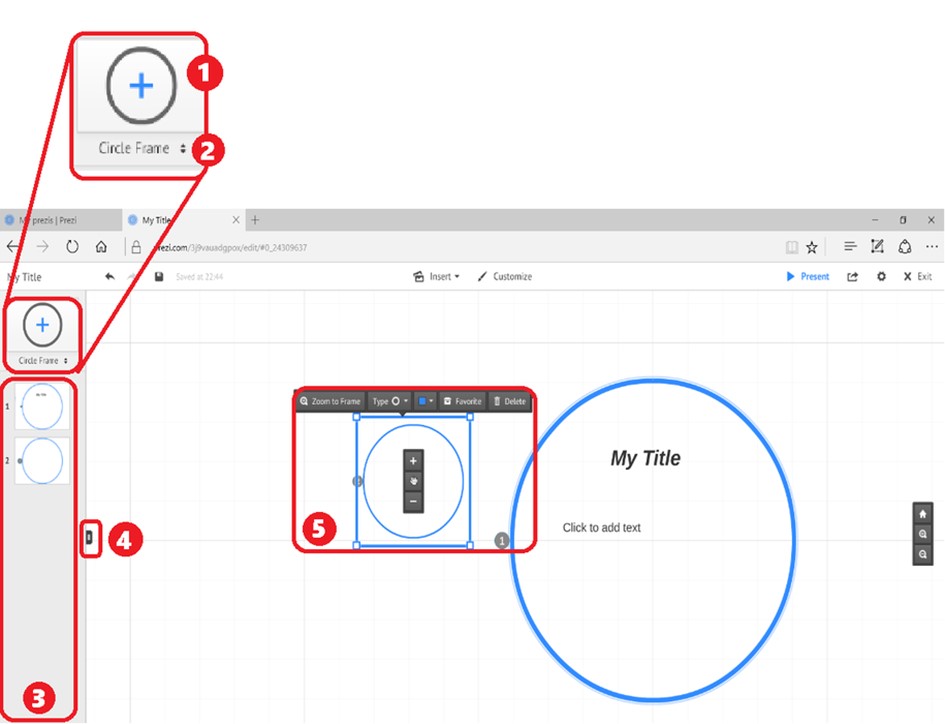
Step 5 - Create Frames: To create a new frame, click in the top left corner of the page where there is a circle with a "+" symbol in the centre; you can change the shape of the new frame before adding it by clicking on the "Circle frame" icon and selecting between: bracket; circle; rectangle. After selecting a shape you like, click on the "+" button and a new frame will be added to the screen. On the left side you will see the slide manager, you can hide/unhide it by clicking on the centre handle. Each time you create a new frame, it will be added to the presentation in this order; you can resize the frame by clicking and dragging the edges of the frame that appears when you select a frame. From the same menu, you can reshape or delete a frame by clicking the relevant labelled buttons.
Step 6 - Adding Text: Begin by adding text, to do so click inside the frame that you just added and a text field will appear which will allow you to type alongside the same floating toolbar containing the text styling choices described earlier. Give your new frame a title by selecting “Title” from the floating toolbar. To add body text, simply click on a different area of the frame and a new text field will appear, select on “Body” from the floating toolbar to create body text, which will be distinct from the title in appearance.

Step 7 - Add As Many Frames As You Need: Add as many slides as required by your respective presentation by clicking on the “+” circle button on the top left corner of the page; add your textual information using the methods described above.
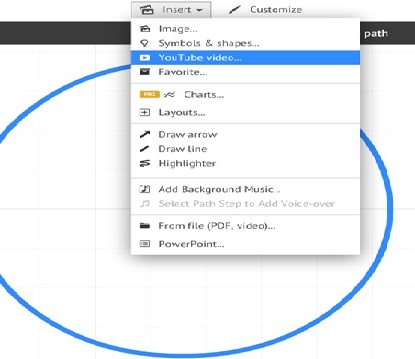
Step 8 - Adding Images: To supplement your text, you may want to add photos or even videos, in order to do so, simply click on “Insert” at the top of the page. To add a photo click on “image” from the drop down menu and a side menu will appear with pre-loaded images; you can select one of their images or add your own by clicking on the “Select files” button and searching your computer files for the desired image. Add your image to a frame by clicking and dragging into your frame of choice.
Step 9 - Adding Videos: To add a video using the “insert” menu, click on “YouTube video. A small pop up screen will appear; paste the YouTube video URL on this text field and click on the “Insert” button and the video will be added to your presentation.
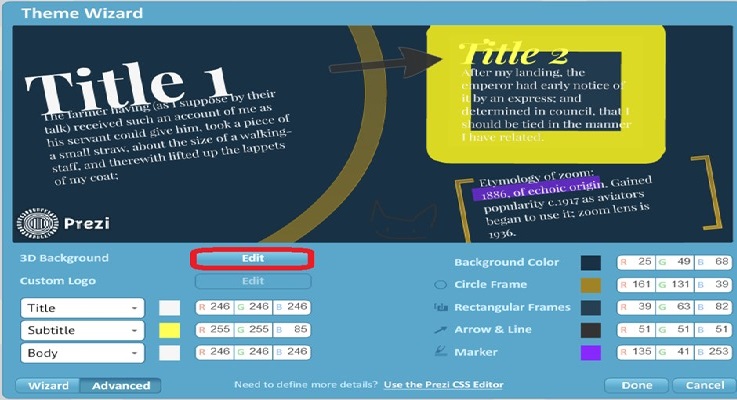
Step 10 - If you want to edit your theme more precisely, go back to the Customise panel and scroll down to the bottom, there click on the "Advanced" button. This will bring up a small screen with many more options for customising your theme, for example you can change each of your theme's colours, such as the frame and arrow colour, as well as the default text colour of the body, subtitle and title. You can also apply a 3D background to make your Prezi more immersive and fun.